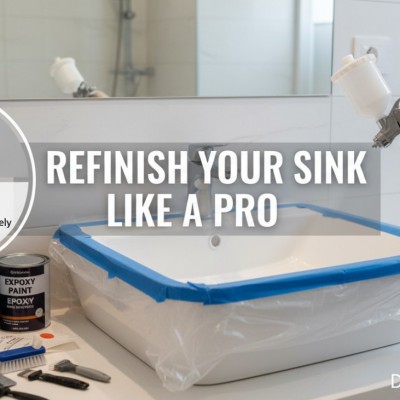
If you searched how to refinish bathroom sink because your bowl is chipped, stained, or just tired-looking, here’s the short version that actually works: clean and degrease like your life depends on it, scuff or etch the glaze, fix chips, mask everything, then apply 2–3 thin coats of a two-part coating with proper ventilation and a respirator. Let it cure fully. The finish is only as good as your prep—90% of failures are prep-related.
Quick game plan (what works in the real world)
- Identify your sink material (porcelain/vitreous china, cast iron enamel, cultured marble, acrylic/fiberglass). Not all sinks refinish the same.
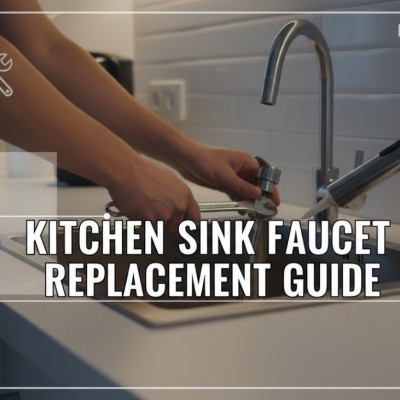
- Remove faucet and drain if you can. Scrape off all silicone. Degrease with TSP substitute, rinse, dry.
- Sand/etch: 220–320 grit scuff on glossy surfaces. For porcelain, scuff plus a bonding promoter is your friend.
- Fill chips with epoxy putty or automotive body filler. Sand flush, prime spots if needed.
- Mask room like you’re painting a car. Set up an exhaust fan in a window.
- Roll or spray a two-part epoxy or acrylic urethane. Two to three thin coats, tip off sags, respect recoat windows.
- Cure 24–72 hours before water, 7 days to full hardness. Reinstall hardware and re-caulk after cure.
First: know what you’re standing over
Here’s the thing—how you prep depends on what the sink is made of. If I were standing in your bathroom right now, I’d tap the bowl with a coin and check the underside with a flashlight.
| Material | Can you refinish? | Prep notes | DIY lifespan | Skip DIY if… |
|---|---|---|---|---|
| Porcelain/vitreous china (ceramic) | Yes | Thorough scuff + bonding agent; fill chips | 2–5 years | Cracks through the body, leaks, severe crazing |
| Cast iron or steel with enamel | Yes | Sand rust to bright metal; treat rust; strong adhesion key | 3–6 years | Rust has undermined the overflow or flange |
| Cultured marble/solid surface | Yes | Sand uniformly; often refinish entire top + bowl | 3–6 years | Structural cracks or delamination |
| Acrylic/fiberglass | Yes | 320–400 grit scuff; flexible coatings help | 2–4 years | Soft, crazed, or moving substrate |
| Stone/composite granite | No (not with paint) | Different process entirely | — | Replace or professional stone repair |
| Stainless steel | No (don’t paint) | Refinishing paint won’t last | — | Polish or replace |
What you need (and why)
- Degreaser: TSP substitute or a dedicated surface prep cleaner. Removes soap film and waxes that cause fisheyes.
- Abrasives: 220 and 320–400 grit sandpaper; Scotch-Brite pad for contours.
- Filler: Two-part epoxy putty or automotive body filler for chips; rust converter for any rusted steel/cast iron.
- Adhesion promoter/bonding agent: Bulldog, XIM, or the bonding wipe included in some refinishing kits—especially helpful on porcelain glaze.
- Coating: Best longevity comes from two-part acrylic urethane or two-part epoxy designed for tubs/sinks. Kits exist; pro-grade products last longer.
- Applicators: High-density foam rollers and good-quality foam brushes for “roll-and-tip,” or an HVLP sprayer if you’re set up for it.
- Masking: Blue tape, masking paper/plastic, drain/faucet plugs.
- PPE: Organic vapor/P100 respirator, nitrile gloves, goggles, long sleeves. Ventilation fan and box fan for exhaust.
- Solvent wipes: Isopropyl alcohol or a paint prep solvent to remove final dust and oils.
- 100% silicone caulk for reinstallation after cure.
Setup and safety (this is the part most people rush)
Coatings that actually last are solvent-heavy. That means fumes and flammability. Open a window, stick a box fan blowing out, and crack a door to bring fresh air in. Cover vanity, wall, and floor with masking plastic. Turn off pilot lights and avoid sparks. Wear an organic vapor/P100 respirator—even when rolling. Pets out. HVAC off to keep overspray from traveling.

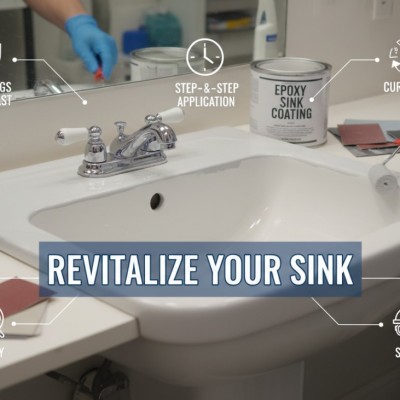
Step-by-step: how I refinish a bathroom sink
1) Disassemble and strip the silicone
Shut off water, disconnect lines, and pull the faucet and drain if you can. It’s cleaner and gives you better edges. Slice away all old silicone with a sharp razor and a plastic scraper. Silicone residue causes fisheyes—use a silicone remover or a wax-and-grease remover, then follow with soap and water. Rinse and dry.
2) Deep clean and scuff
Scrub with TSP substitute and a Scotch-Brite. Rinse with hot water, then wipe with isopropyl alcohol. Sand the bowl and rim lightly with 220–320 grit until the shine is dulled. Vacuum dust and tack-cloth it clean. For rust on a steel/cast iron sink, sand to bright metal, treat with rust converter, and prime those spots with a compatible metal primer if your coating requires it.
3) Repair chips and pits
Mix a small batch of two-part epoxy putty or body filler. Press it into chips and feather the edges. Once cured, sand flush with 320 grit. Wipe clean. I once spent an hour chasing “mystery bumps” that were just missed pinholes—use a bright light and feel with your fingertips.
4) Bonding agent and masking
On dense glazes (porcelain/vitreous china), a bonding promoter helps the coating bite. Follow the product’s timing exactly. Mask the counter, backsplash, overflow, and cabinet. Plug the drain or tape it cleanly if you didn’t remove hardware.
5) Mix and apply the coating
- Temperature and humidity: Aim for 70–78°F and under 60% RH. Cold rooms cause sags and poor cure.
- Mix accurately: Two-part products are fussy. Measure, mix thoroughly, and wait the specified induction time.
- First coat: Thin is king. Roll with a high-density foam roller and lightly “tip off” with a foam brush to kill bubbles.
- Flash time: Most products want 30–60 minutes between coats; don’t miss the recoat window or you’ll need to sand again.
- Second coat: Another thin coat. Inspect for dry spots on the vertical walls of the bowl. If needed, a third coat builds gloss and durability.
If you get a run, let it tack, then gently slice the sag’s edge with a razor and feather it next coat. Don’t keep loading material—heavy coats look good wet and fail fast.
6) Cure and reassemble
No water for at least 24–48 hours; read your product label. Full hardness can take 5–7 days. Reinstall drain and faucet only after the coating is firm—pad your wrench jaws and go easy. Re-caulk with 100% silicone at the very end, then give the caulk 24 hours before use.
Which coating should you use?
- Two-part acrylic urethane (pro-grade): Best gloss and chemical resistance; 5–10 years with good prep. Strong fumes, pricier, sometimes sprayer-only.
- Two-part epoxy (DIY kits): Easier to source and roll, solid durability; expect 2–5 years. Slightly more amber over time.
- Single-part “appliance epoxy” sprays: Fast, but chips easily on sinks. I don’t recommend for a daily-use bathroom.
For most homeowners, a reputable tub-and-tile two-part kit rolled on thinly gives a good balance of effort and life. If you already own an HVLP sprayer and know how to ventilate, a catalyzed acrylic urethane is the gold standard.
Common mistakes I see—and how to avoid them
- Poor degreasing: Any soap scum or wax creates fisheyes. Degrease, rinse, then alcohol wipe.
- Skipping the scuff: Glossy glaze needs tooth. Light, even sanding is non-negotiable.
- Silicone contamination: Invisible residue ruins adhesion. Mechanically remove, then use a dedicated remover and rinse.
- Heavy coats: Leads to sags and soft cure. Thin, even coats win.
- Bad timing: Missing the recoat window forces sanding between coats. Set a timer.
- Ignoring rust under the overflow: It creeps back under the coating. Treat rust before coating.
Aftercare that actually extends the life
- Non-abrasive cleaners only. Skip powders and magic erasers (they’re micro-abrasive).
- No soaking hair dye, nail polish remover, or harsh drain chemicals on the finish.
- Wipe water from the drain edge after use the first month. Some kits allow a light carnauba wax after 30 days—check your product.
Cost, time, and when to call a pro
- DIY materials: $60–$200 depending on kit and supplies.
- Time: 4–6 hours of hands-on work plus cure time.
- Pro refinishing: Typically $300–$600 for a sink, often using catalyzed urethane; expect longer life and a flawless spray finish.
Skip DIY if the sink is cracked through, leaking, or the overflow is rotted. At that point, replacement makes more sense. Also, if you can’t ventilate well or won’t wear a respirator, don’t use two-part coatings—hire it out.
One last reality check
Refinishing isn’t magic—it’s a new, thin coating on top of what you’ve got. Do the prep right and you’ll get years of clean, bright service out of a tired sink. Rush it, and you’ll be looking at peels and chips by the holidays. If I were coaching you in person, I’d keep saying the same thing: thin coats, clean surface, and patience on the cure. That’s the whole game.