If you are here to learn how to paint porcelain sink without it peeling in a month, here is the short version: scrub it to bare clean, scuff it aggressively, then coat it with a two-part tub-and-tile epoxy or an epoxy primer followed by a 2K urethane topcoat. Anything else is a temporary bandage. Porcelain is glass on metal; standard paints do not bite into it.
What actually works (and why most DIY jobs fail)
Porcelain sinks are steel or cast iron with a vitreous glass glaze. That glossy glaze is non-porous and slick, so paint needs chemical bite plus mechanical grip. One-part enamels and rattle-can appliance paint look good for a week, then lift around the drain and high-splash zones. Two-part coatings chemically cure into a hard shell and stick much better when the surface is properly degreased and scuffed.
Here is the thing: the prep is 80% of the job. The part most people miss is removing every trace of soap film, wax, and silicone. If I were standing in your kitchen right now, I would tell you to spend more time cleaning than painting.
Before you start: safety and expectations
- Ventilation and PPE: use a respirator with organic vapor cartridges (OV) and P100 prefilters, gloves, and eye protection. Keep a fan exhausting out a window and bring fresh air in from another. Shut off open flames and pilot lights.
- Temperature and humidity: aim for 70–80°F and under 60% humidity. Cold or humid rooms cause orange peel and slow cure.
- Durability reality: a DIY refinish can last 1–3 years with gentle care. It will not be as tough as factory porcelain.
- When not to DIY: severe rust-through around the drain, flexing thin steel basins, or sinks with active leaks. In those cases, replace or have a pro reglaze.
Tools and materials I trust
- Cleaner/degreaser: TSP or a TSP substitute, plus a non-abrasive scouring powder.
- Abrasives: 220 and 320–400 grit wet/dry sandpaper, Scotch-Brite pads (maroon).
- Solvent wipe: denatured alcohol or acetone (avoid oily mineral spirits).
- Masking: high-quality painter's tape, plastic or paper, drain plug or rubber stopper.
- Filler for chips: 2-part porcelain repair epoxy or auto body glazing putty for tiny pits.
- Coating options (pick one path):
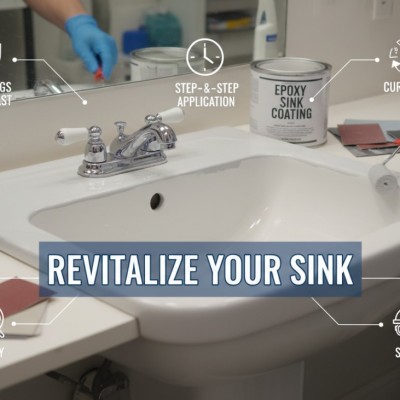
- Two-part tub-and-tile epoxy kit (brush/roll or spray). Simple and proven for homeowners.
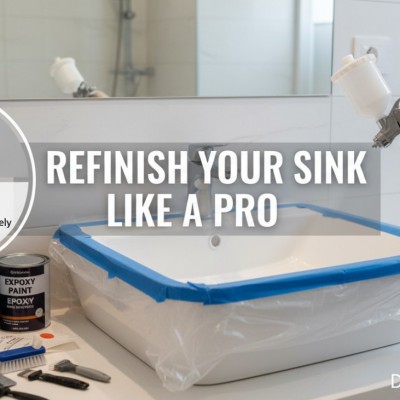
- Epoxy primer + 2K acrylic urethane topcoat (automotive-grade). Harder, glossier, more advanced.
- Application: 1/4 inch microfiber roller or dense foam roller, high-quality brush, or HVLP sprayer if you have experience.
- Caulk: 100% silicone or kitchen/bath sealant for re-caulking after cure.
Step-by-step: how I actually do it
1) Strip the contamination
Remove the drain cover if you can. Scrub the sink with hot water and scouring powder to cut soap film. Rinse, then scrub again with a strong TSP solution. Rinse thoroughly and dry. Wipe with denatured alcohol. Any silicone around the rim must come off; silicone oil causes fisheyes that ruin finishes.
2) Fix chips and level the surface
Feather-sand around chips with 220. Mix a small batch of 2-part porcelain repair or epoxy filler, press it into the chip slightly proud, then sand flat with 320 after it cures. You want a smooth fingertip glide before paint.
3) Mask like you mean it
Mask the countertop, faucet base, backsplash, and overflow openings. Plug the drain with a rubber stopper or tape. Lay plastic to catch dust and drips. Good masking lets you focus on application instead of panic wiping later.

4) Scuff for mechanical bite
Wet-sand everything you plan to coat with 320–400 grit until the gloss is gone. Use maroon Scotch-Brite for curves and around the overflow. Rinse the slurry away and dry completely. Do not use acid etch at home; it is not worth the safety risk.
5) Final clean and tack
Wipe with alcohol or acetone on a lint-free cloth. Let it flash dry. Use a non-silicone tack cloth or a barely damp microfiber to pick up remaining dust. If your rag squeaks, the surface is clean.
6) Mix and apply your coating
- Two-part epoxy kit: mix Parts A and B exactly as directed. Respect pot life; some kits give you 4–6 hours.
- Roll or brush thin coats: start at the rim, then down into the bowl, and finish at the drain. Two to three light coats beat one heavy one. Allow the recommended flash time between coats.
- If spraying (advanced): a small HVLP gun at low pressure gives a glassy finish, but you need control and excellent ventilation.
Watch for sags under the rim and around the drain. If a drip forms, lightly tip it off with the brush in the first few minutes. After it gels, let it be; you can nib and polish after cure.
7) Cure and reassemble
- Dust-free in several hours, light handle in 24 hours, no water for 48–72 hours. Full hardness usually takes 5–7 days.
- Keep the room gently warm and dry. A small dehumidifier helps.
- Re-caulk the perimeter after full cure and reinstall hardware.
Common pitfalls and quick fixes
- Fisheyes or craters: almost always silicone or oil. Let it cure, sand the defects with 400–600, wipe with alcohol, and recoat. Next time, remove old caulk and avoid oily cleaners.
- Peeling at the drain: edges were not scuffed enough or water hit too soon. Sand back to solid, scuff wider, and recoat after full dry.
- Orange peel texture: applied too thick, cold room, or poor leveling. After a week, wet-sand 1000–1500 and hand polish, or scuff and apply one more thin coat.
- Dust nibs: let cure, wet-sand 1500, then polish. Control dust better on the next pass.
Is DIY worth it vs pro reglaze or replacement?
| Option | Typical Cost | Time | Durability |
|---|---|---|---|
| DIY tub-and-tile epoxy | $40–$80 | 1 weekend | 1–3 years with care |
| Pro reglaze (sprayed 2K) | $300–$500 | Half day + cure | 3–7 years |
| New sink + plumbing | $150–$600+ | Half to full day | 10+ years (factory glaze) |
When I see deep rust around the drain or a flexy steel sink that drums when you tap it, I usually recommend replacement. A heavy cast-iron or fireclay sink will outlast a refinish job by decades.
Care so it actually lasts
- Clean with non-abrasive soap or mild bathroom cleaner. Avoid scouring powders, steel wool, and magic erasers on the coating.
- No soaking with straight bleach or harsh acids. If you must disinfect, dilute and rinse quickly.
- Use a dishpan or rubber mat only occasionally; trapped water under permanent mats lifts finishes.
- Do not set hot pots or curling irons in the sink.
Quick recap
Success comes down to obsessive cleaning, thorough scuffing, and using a true two-part coating in thin, patient coats. Respect cure times, keep water off it for a few days, and treat it kindly. Do that, and your refreshed porcelain sink will look sharp long enough to make the effort worthwhile.
If you run into edge cases like recurring fisheyes after multiple cleans, or you are debating reglaze vs replacement for a heavily chipped basin, those are signs to pause and reassess before throwing more coats at the problem.